Remote Control
Take control of computers across your network, or across the world. Remote Control allows you to control a PC as if you were there. Includes a blazing fast search to find computers quickly
Product Links
News And Tips
Remote Control Client Manual
Take a look at our quick start guide for simple setup. Below is the complete documentation for the client.
Table of contents
1. Connecting to a remote host
2. Using an alternate port number
3. Managing Computer Lists
4. Finding Computers
5. Automatic installation of the server software
6. How to request permission before connecting
7. View only, and disabling the remote users keyboard and mouse
8. Removing the server software on disconnect
9. Locking the workstation , or logging off on disconnect
10. Showing or hiding the tray icon and the status window
11. Saving settings
12. Launching the client from the command line
13. Viewing in full Screen Mode
14. Stretch the client window to fit
15. Save a remote screen to a JPEG file
16. Sending CTRL-ALT-DELETE to remote host
17. Connection Problems
18. What password to use?
19. Setting a default username and password
Connecting
To connect to a remote host, type its host name or IP address in the connect window, and press connect.
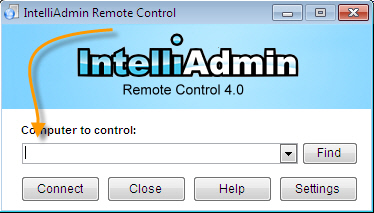
To connect successfully, the server software must be already installed on the remote side, or file and printer sharing need to be properly configured to allow an automatic server installation.
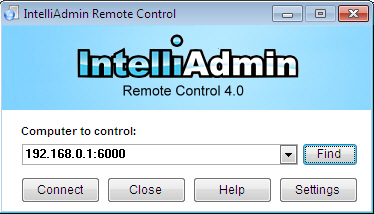
Alternate Ports
Sometimes you may have a server that is configured to listen on a port other than the default 2792 (TCP). If this is the case, you can specify a port by placing it after the host name with a colon.
For example, if we wanted to connect to 192.168.0.1 on port 6000, it would have this syntax:
The client can automatically install the server over your local area network. The feature is enabled by default. You can enable or disable it in the settings window:
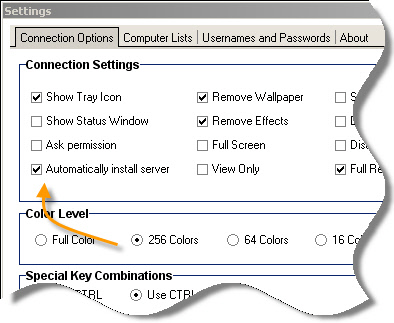
This feature has a few requirements:
-You need to have local administrator rights on the remote machine
-Your password must be set. Blank passwords will be denied.
-File and printer sharing need to be properly configured, and opened in the firewall.
Security features in newer versions of Windows like XP SP2/3, Vista, and Windows 7 may prevent automatic install from working properly. To remotely install, an exception for file and printer sharing needs to be made in the firewall.
Read these articles for more information on configuring file and printer sharing:
File and printer sharing in Windows 7
File and printer sharing in Vista
File and printer sharing is Windows XP
If you have a larger network, you may be interested in this article:
Using group policy to enable file and printer sharing
To initiate an automatic install, simply type in the name of the computer you would like to control, and click connect:
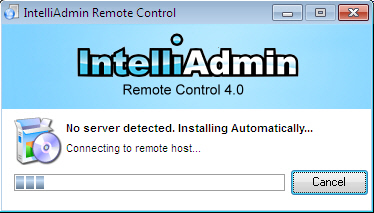
When the client pushes the install, you can change the default install settings:
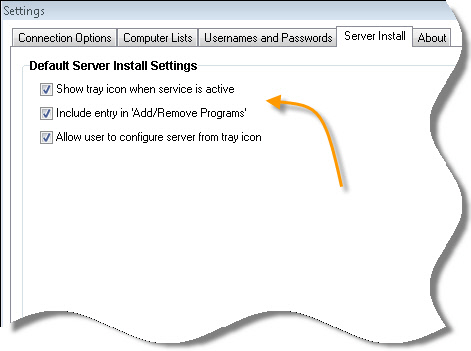
With these settings, you can:
-Disable/Enable the configure button on the local IP information form that is displayed when the user clicks on the tray icon
-Disable/Enable the tray icon that is displayed when the remote control service is active (Not to be confused with when you as an administrator are connected)
-Disable/Enable displaying the server application in ‘Add/Remove’ programs on the remote machine.
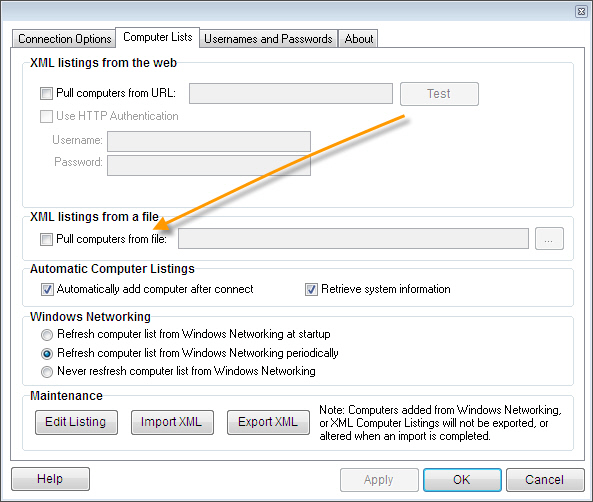
The computers that are shown in the find window can be pulled from a number of locations. All of these options are in the settings window, under the Computer Lists tab.
One of the ways you can get computers in this list is from XML files on a webserver, or a shared folder on your local network. Within this XML file a computer tag is used, and has these fields:
{Host} – The host that the client will connect to
{FriendlyName}– Usually a domain name used for display purposes only. Client will not use this to connect
{Description} – A text description of the last user that was logged into the remote computer
Lets look at a quick XML example:
<?xml version="1.0" encoding="UTF-8"?>

<computer>

 <host>10.10.12.20</host>

 <friendlyname>server1.intelliadmin.com</friendlyname>

 <description>Steve Wiseman. Extension: 1212</description>

</computer>

<computer>

 <host>10.10.12.21</host>

 <friendlyname>server2.intelliadmin.com</friendlyname>

 <description>Sam Smith. Extension:1213</description>

</computer>
In this example we have two computers in our XML file, and now they will appear in our find window if used in a XML page on a website, or locally pulled from a network share:
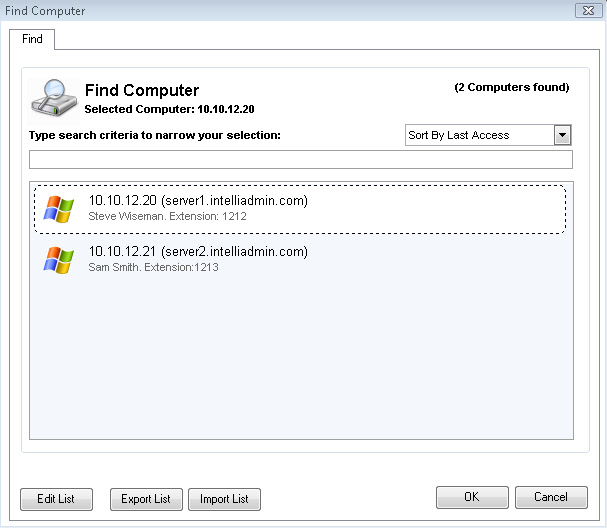
Note that other information like the operating system, and username are not provided in the XML file. This is because this information is sent automatically by the server to the client. Keep in mind, it will take at least one connect before this information will appear.
There are a few different ways an XML file can be used to pull computers for the find window. The first is via an HTTP, or HTTPS XML URL. You can specify a web URL that returns XML in the format shown before. The remote control client will check this URL for changes every time the user clicks the find button.
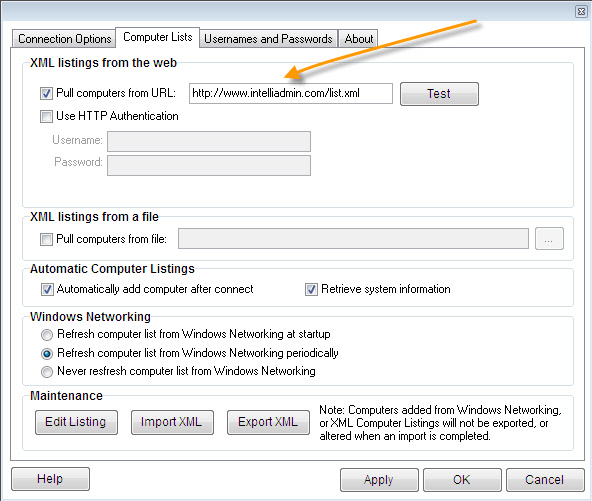
Once you have entered a URL, you can click on the test button to make sure it works properly. The HTTP URL field supports HTTP, and HTTPS. Internet Explorer settings are used to determine proxy values.
Another method, is an XML file. A good use for this is putting an XML file on a network share that multiple clients may access. This file is loaded each time the application starts:
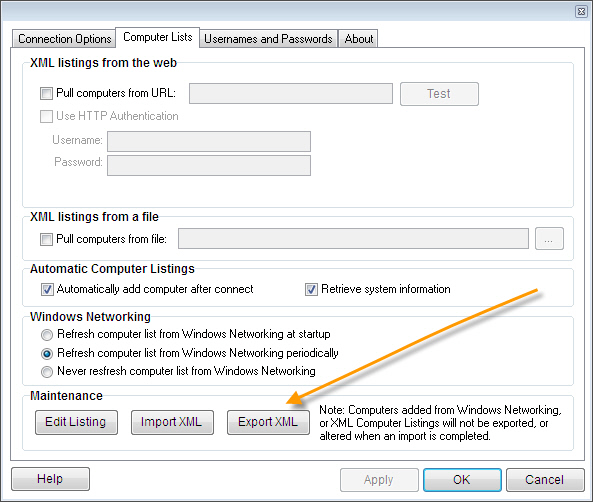
If you want to backup your listing of computers you can export the entire list as an xml file. Just click on the “Export XML” button.
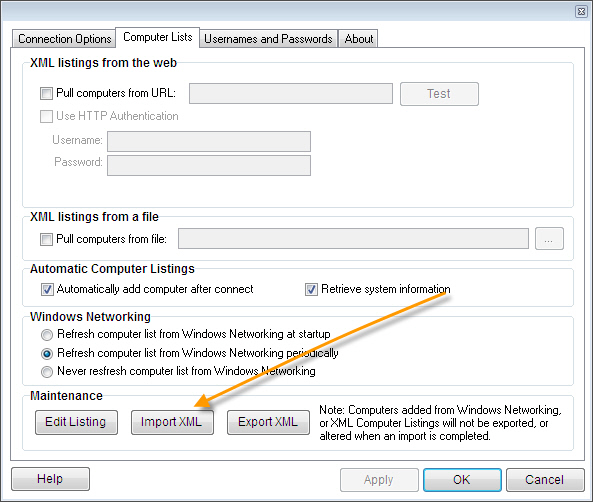
If you only want to load a previous backup, restore it by clicking on the import XML button:
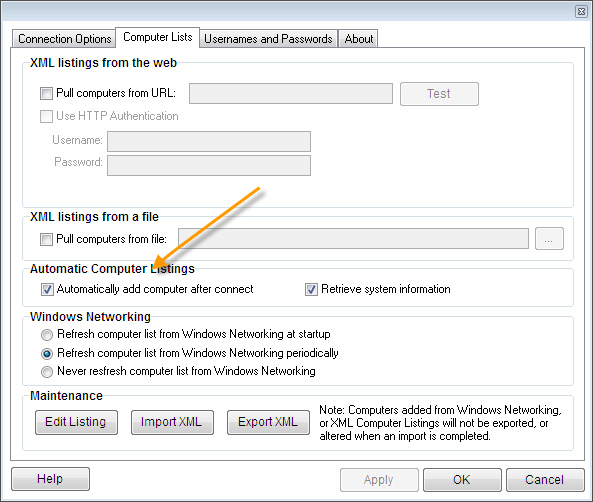
By default, the client will periodically search the windows network for computer names. If you want to disable this, or only search when the application is launched then pick the appropriate option:

When the client connects to the remote server, it will automatically add it to the computer database that shows up in the find window. In addition, it pulls the current username, computer name, operating system and service pack. All of this can be used to quickly find the host in the find window. You can customize this by changing the settings under Automatic Computer Listings:
Computers in the find window can be edited. Two exceptions to this are computers pulled from a HTTP/HTTPS XML URL, and XML Files. Those cannot be edited, and the XML file or URL must be updated to make a change.
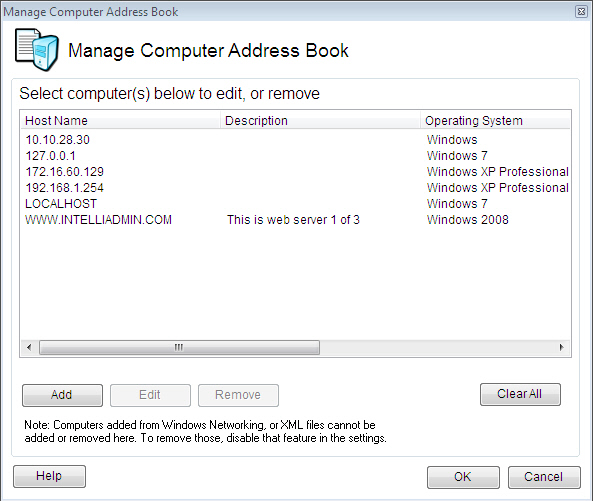
You can manually edit current computer listings, and add new ones by clicking on the add or edit button. Simply fill out the information, and click OK:
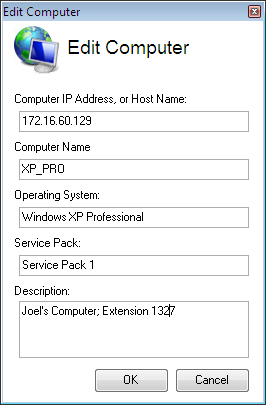
Note that all of this info is quickly search-able in the find computers window. So in the above example I could simply type the users phone extension 1327, and their computer would be instantly brought to the top of the list.
Finding Computers
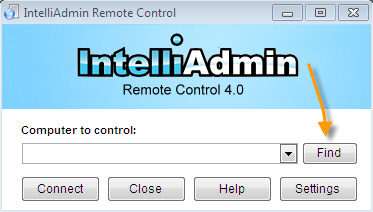
Now that you have been able to get your list of computers into the client, how can you find them? Simply click on the find button on the main window:
A find window will be displayed that shows all computers, sorted by the most recently accessed:
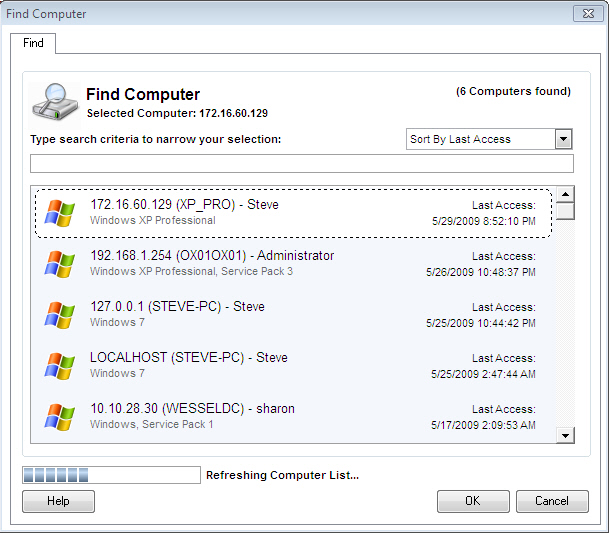
Then, if you want to narrow the list down, simply start typing any information related to the computer you want to find and only computers that match will be displayed:
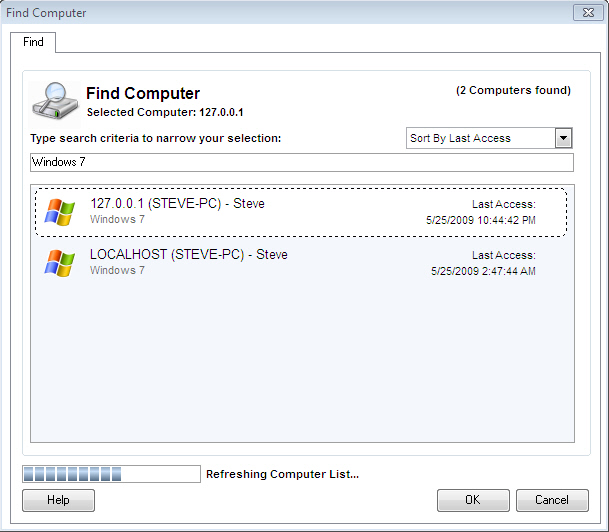
The client will search XML, and Windows networking hosts in the background so you don’t have to wait. The client will also cache this information so once it has loaded, the old information will be there until an update has completed.
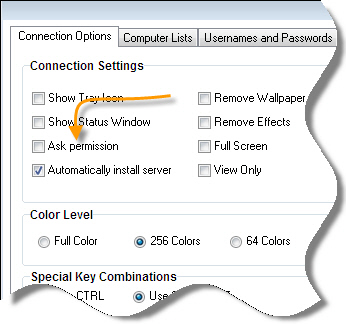
Request Permission Before Connecting
If you want to ask permission before controlling a machine, you can simply check the box “Ask Permission”:
When you connect, you will be asked to wait:
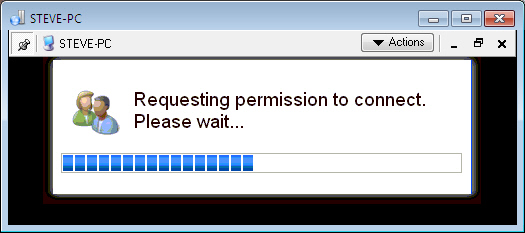
And the end user will be asked permission:
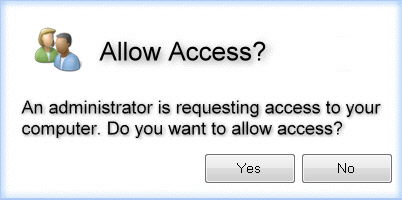
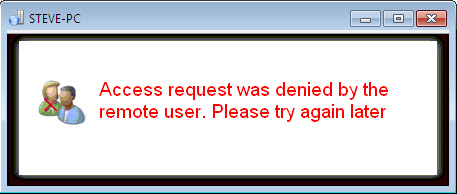
If the remote user accepts your request, you will be immediately given access to the remote machine. If they reject your request you will see a window like this:
You can force a user to request permission before connecting by changing user settings on the server. See the server manual for more details on how to do this.
It is possible to prevent your mouse movements and keyboard input from being sent, and it is also possible to prevent the remote user from accessing the mouse or keyboard while you are connected. Simply check the appropriate option in the settings window:

These settings can be enforced by making changes to the agent user account. See the server manual for more details.
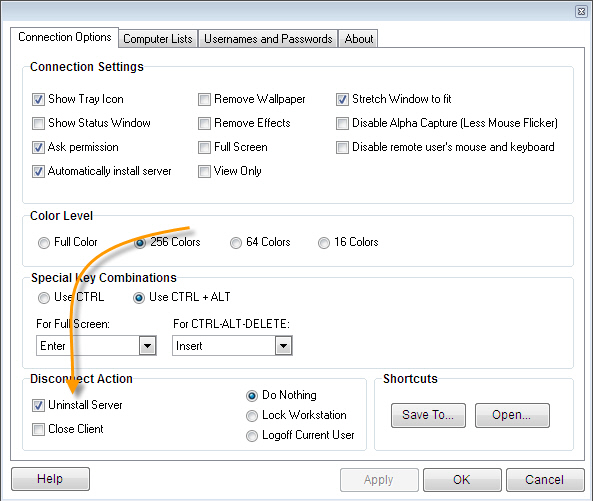
This option allows you to uninstall the server automatically when you disconnect. It uses windows networking to remove the agent, so you must be on the same local area network for it to remove the server. If a server is across the Internet, you will need to uninstall manually:
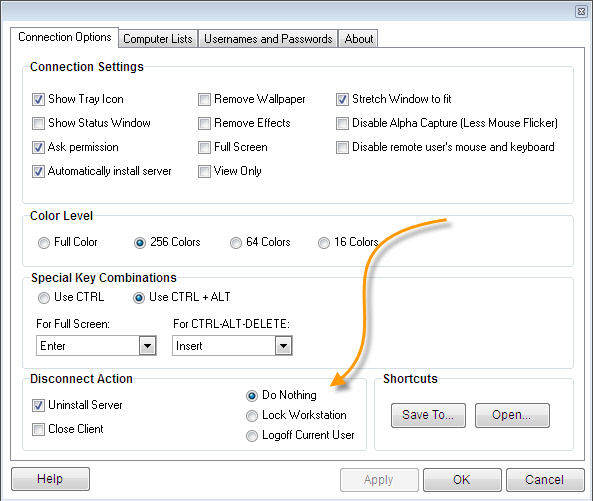
Locking or Logging off on disconnect
Force the workstation to lock, or force the session to logoff on disconnect.
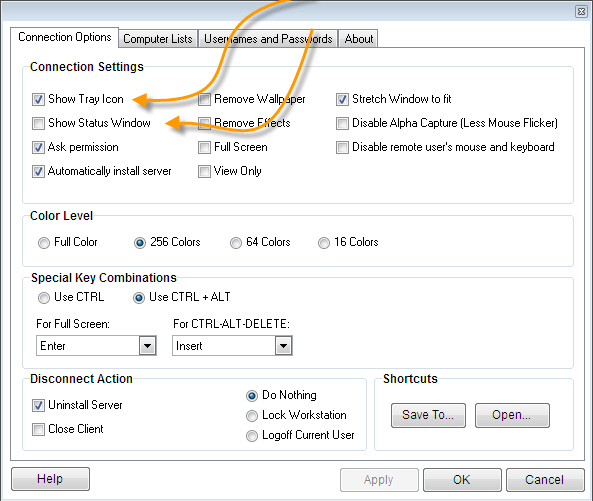
The tray icon, and status window are visual indicators shown to the user when you are connected. These can be enabled by visiting the options area of the client. Simply check the box “Show Status Window”, and “Show Tray Icon”:
The status window starts in the top right corner of the primary monitor, and will move to get out of the way of your mouse:
![]()
The tray icon will be displayed near the time, and blinks with a green checkbox:
![]()
Just like the request permission feature, you can change options in the server to force these to be active at all times. See the server manual for more details
When Remote Control is launched, the default settings are used. These can be changed by simply picking the
settings you prefer and clicking the “Apply” button.
If you want to create a shortcut with custom settings, pick the settings you would like, go to the shortcuts tab and click on the “Save As” button.
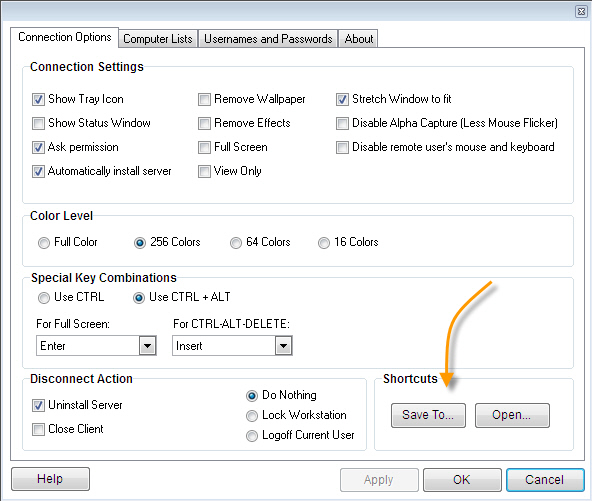
Save the shortcut to the hard drive. By clicking the “Save To…” button. A window will be displayed for you to enter
the hostname or IP address of the shortcut:
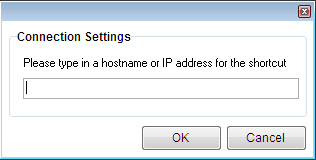
You will then be prompted to pick where to save the shortcut. Once it is saved, you can simply double click on the icon to connect to that host:

Launching from the command Line
Settings can be passed to Remote Control in two ways: Via a URL, or from the command line.
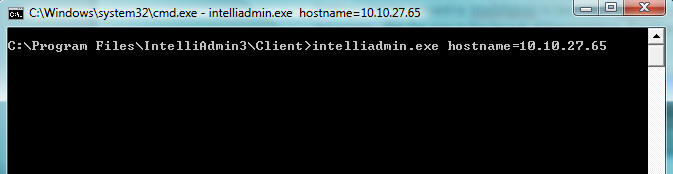
Remote Control can be called with arguments after the executable name in the format of Name=Value. For example. If we wanted to set the hostname to computer1, it would look like this:
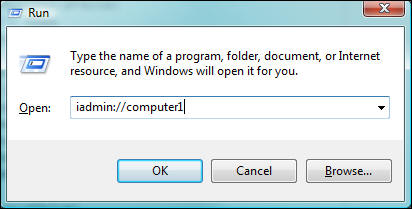
Another way to use command line arguments is to launch it via the URL iadmin://
iadmin://computer1
To launch Remote Control and connect to computer1 automatically:
The iadmin:// URL follows Windows specifications for Internet URLs. If you want to set additional parameters, you need to use this format:
iadmin://computer1?Name1=Value1&Name2=Value2&Name3=Value3
Supported variables that can be set from the command line, or a URL:
HostName - The hostname IntelliAdmin will connect to when launched (TEXT)

FullScreen - Viewer will be maximized to full screen when connected (TRUE/FALSE)
ShowTray - Displays the tray icon to the remote user (TRUE/FALSE)
ShowStatus - Displays a status window at all times while an administrator is connected (TRUE/FALSE)
RequestAccess - Asks permission from the remote user before controlling their machine. (TRUE/FALSE)
AutoUninstall - Automatically removes the agent after disconnect (TRUE/FALSE)
AllowInstall - Automatically installs agent if connection fails (TRUE/FALSE)
ExitOnDisconnect - Closes client on disconnect (TRUE/FALSE)
LogOff - Log off system after disconnect (TRUE/FALSE)
LockWorkstation - Lock workstation after disconnect (TRUE/FALSE)
DisableRemoteInputs - Disable mouse and keyboard for remote user while connected (TRUE/FALSE)
DisableLocalInputs - Do not send mouse or keyboard events to remote machine (TRUE/FALSE)
DisableEffects - Disable user interface effects that tend to slow down remote control screen updates (TRUE/FALSE)
RemoveWallpaper - Turn off wallpaper while connected to remote users machine (TRUE/FALSE)
DisableAlphaCapture - Turn off alpha capture when controlling remote host (TRUE/FALSE)
ColorDepth - Set the color Depth that the remote machine is displayed. (0=TrueColor, 1 = 256 Colors, 2 = 64 Colors, 3 = 16 Colors)
InstallServerTrayIcon - Indicates the default setting of the server tray icon when the client installs the server software (TRUE/FALSE)
InstallShowUninstall - Indicates that when installing the server, show an entry in add/remove programs if set to true. (TRUE/FALSE)
InstallShowConfigureButton - Indicates that when installing the server, the configure button should be displayed if set to true. (TRUE/FALSE)
A final and more complex example of using command line parameters:
We want to set the color to 256, disable user interface effects, and force the machine to logoff when we disconnect:
From the command line:
iadmin.exe HostName=Computer1 ColorDepth=1 DisableEffects=True LogOff=TrueFrom A URL:
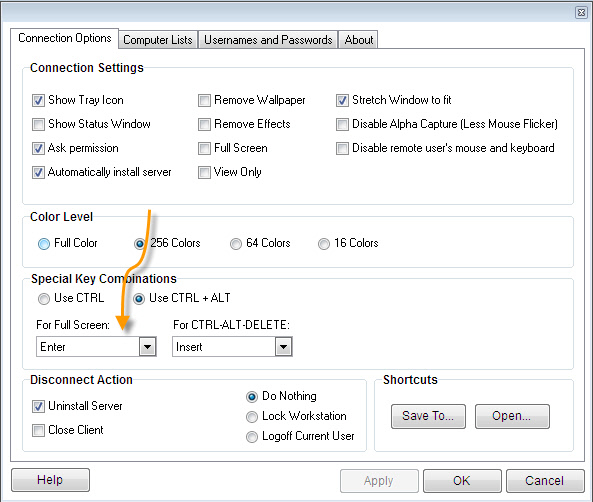
iadmin://computer1?ColorDepth=1&DisableEffects=True&LogOff=TrueThe viewer can easily be switched to full screen mode by pressing ctrl-alt-enter all at the same time. This is
the default setting, and it can be changed if you want to use a different key combination. Just go into settings, and change it in the connection options tab:
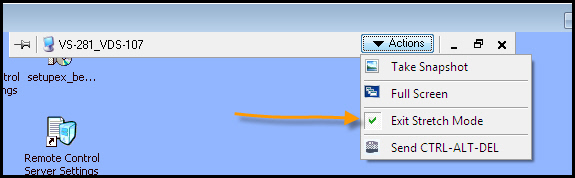
Once you are connected to the remote host, you can tell the viewer to stretch the current window to fit. This helps when the remote host has a screen that is much larger.
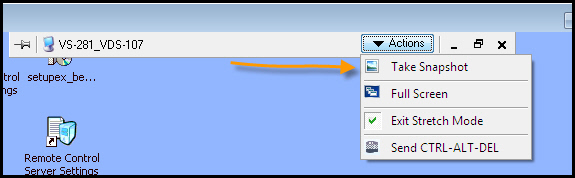
Sometimes you need to take a screen shot of the remote host. This can be easily accomplished by clicking the “Take Snapshot” menu item. Then simply save it:
Sending CTRL-ALT-DELETE from remote host
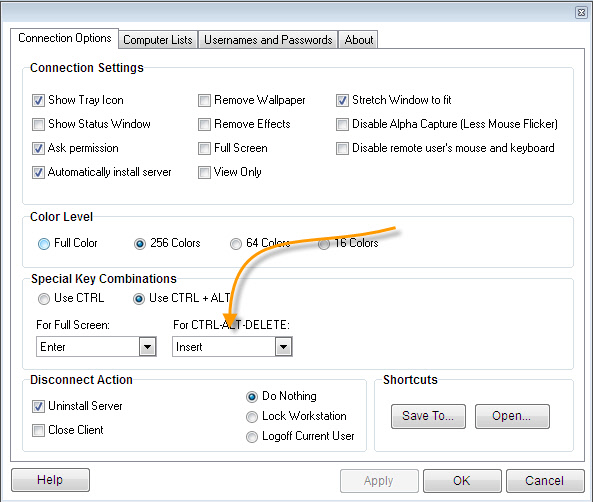
This key combination can be sent to the remote host by pressing CTRL-ALT-INSERT all at the same time. This is the default setting, and it can be changed if you want to use a different key combination:
There are a few reasons why you may not be able to connect to a remote machine:
-A firewall or a router is blocking port 2792
-The remote machine is not running the IntelliAdmin Remote Control Server.
If a firewall is blocking the connection, you will need to make sure TCP port 2792 is open for listening on the remote host.
Which password do I use?
If you are using windows accounts for authentication, make sure the username has a password or it will reject it for security reasons.
If you are using IntelliAdmin to control machines all over your LAN you can save a default set of credentials. These will be used before asking you to enter a username and password. To set default credentials, go into the settings window, and click on the usernames and passwords tab. You can enter them after enabling it:
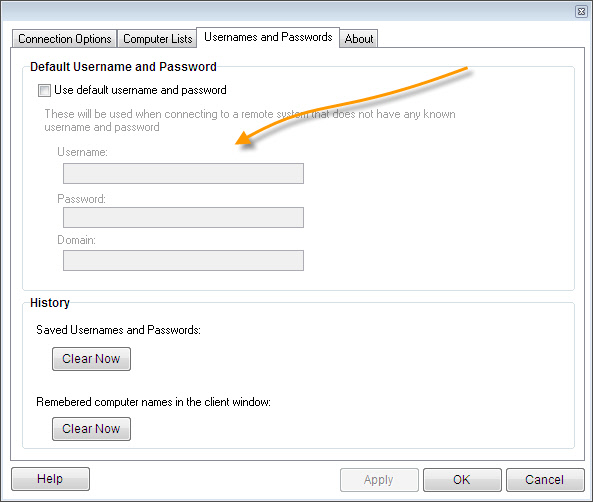
The password is stored in an encrypted format in the registry.
If you still have any questions please feel free to send us an email at: support@intelliadmin.com and we are glad to help.