How to enable file and printer sharing on XP SP2
If you haven’t figured out by now, we sell remote control software for windows. The cool part about it is that you do not even need to go to the remote computer and install an agent to control it.
When Microsoft released Service Pack 2, we noticed more and more trial users complaining that they could not connect to their Windows XP machines. We couldn’t figure it out. We had tested with XP SP2 and it worked fine for us. The trick was that Microsoft had created different settings for users that were not part of a domain.
Effectively file and printer sharing are disabled when XP SP2 comes out of the box – this broke our automatic install feature since IntelliAdmin could not connect to the $admin share.
After scouring the internet we found how to re-enable file and printer sharing for your stand alone XP SP2 machine – and it is secure.
Here are the step by step instructions for turning it back on:
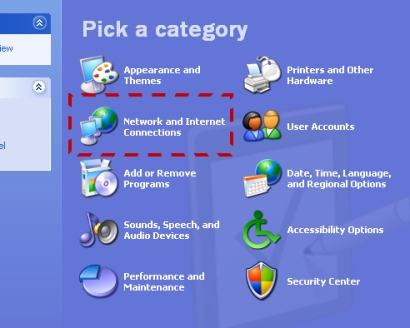
1. Open the control panel. You will find this by clicking on start, then settings, and then control panel. Click on the icon that says “Network and Internet Connections”
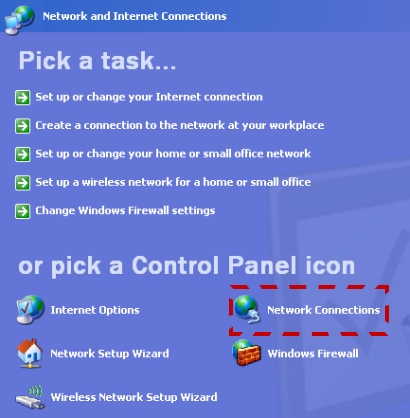
2. Once you are in there. Click on the icon that says “Network Connections”
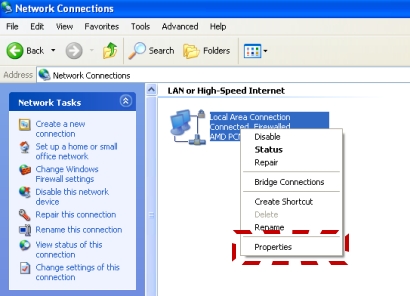
3. Now you will find your network cards listed here. You will need to right click on the card you want to enable file sharing. Select the properties menu
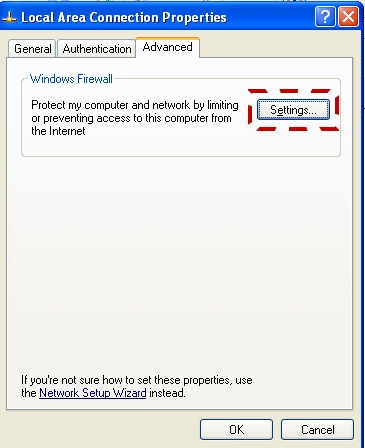
4. Go to the advanced tab, and click on settings
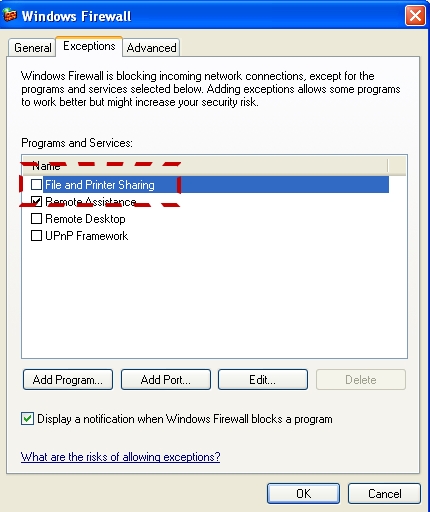
5. Go to the exceptions menu and make sure file and printer sharing is checked.
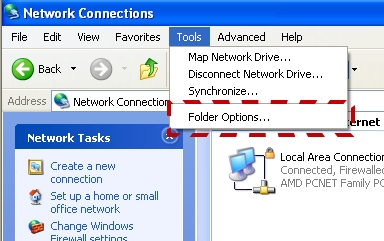
6. Click OK, and in the “Network Connections” Folder click on the tools menu, and select “Folder Options…”
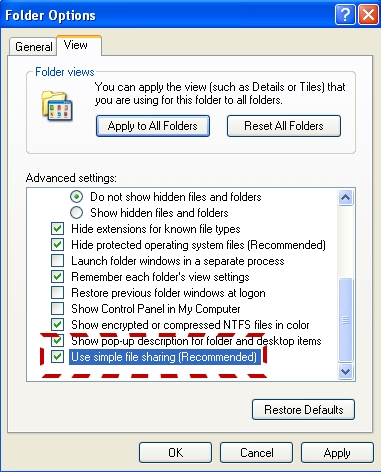
7. Go to the view tab. Scroll down and make sure “Use simple file sharing” is unchecked.
8. Click OK. Sharing is now on, but if you have not set a password for your username you still will not be able to share – Once you do this you will now be able to share printers and files again.
One more thing…Subscribe to my newsletter and get 11 free network administrator tools, plus a 30 page user guide so you can get the most out of them. Click Here to get your free tools
{ 7 comments… read them below or add one }
Very useful boud
Awesome! Great article! I spent hours (unsuccessfully) trying to troubleshoot why I couldn’t connect remotely. Wish I’d found tnis article sooner. Turning off simple file sharing did the trick.
Still facing problems, I exactly followed the same instructions, but it still shows the same error – The installation requires File and Print Sharing to be enabled. Please enable this service and run setup again.
What software are you trying to install? Maybe there is an issue with it that keeps it from detecting F&P sharing.
Hi
I did it but the file and printer sharing Properties is not enabled.I need to enable Browse-Master of my computer by Properties button of File and printer sharing.What is your Solution?
Best wishes
Ekhorasan
WELL DESCRIBED ARTICLE.
Thankyou Thankyou Thankyou
Tearing what little hair I had out. Sorry wasn’t using your tools but struggled to find why I couldn’t find an answer and needed to remotely install software.