Our remote control software, IntelliAdmin 2006, does not allow access to Windows XP machines that have been updated to SP2. This is because SP2 effectively disables file and printer sharing – a feature that IntelliAdmin uses to automatically install remote control software.
Even if you are not using our program, a modified version of this tutorial is of importance – it will allow you to get file and printer sharing back the way it used to be before you installed SP2 – without compromising security
Here is a step by step guide to get it to work with SP2:
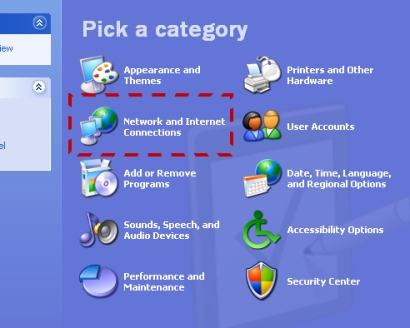
1. Open the control panel. You will find this by clicking on start, then settings, and then control panel. Click on the icon that says “Network and Internet Connections”
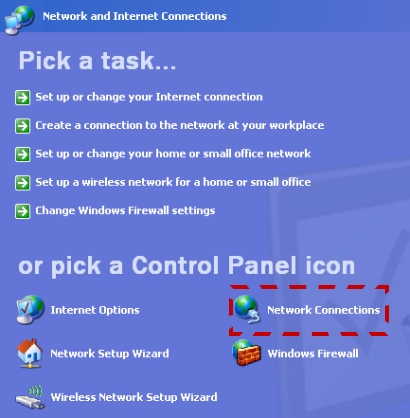
2. Once you are in there. Click on the icon that says “Network Connections”
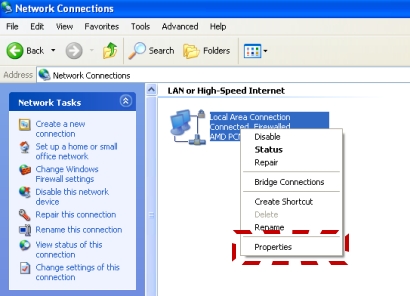
3. Now you will find your network cards listed here. You will need to right click on the card you are using to connect to your LAN. A menu will appear – click on properties.
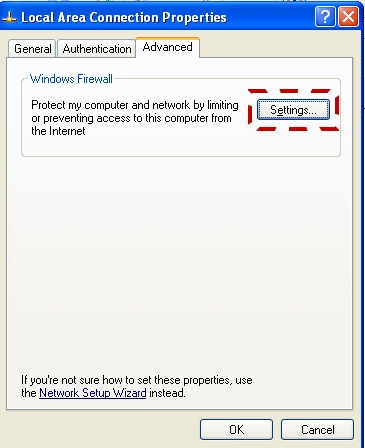
4. Now a form will appear. Go to the advanced tab, and click on settings
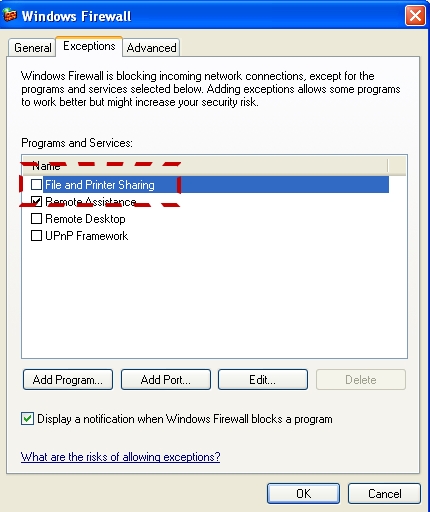
5. Another window will appear. Go to the exceptions tab and make sure the file and printer sharing is checked
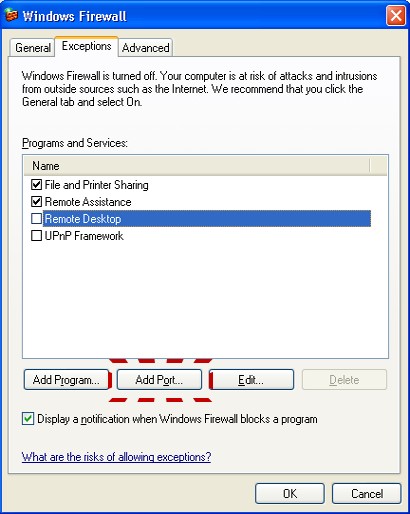
6. On this same window click on “Add Port”
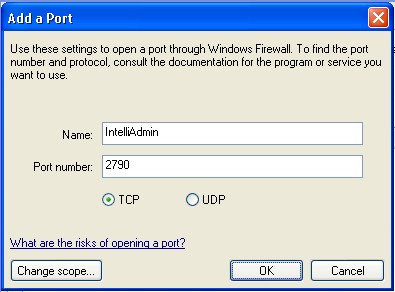
7. A new window will open – For the name enter “IntelliAdmin”, and the port put in the value “2790”
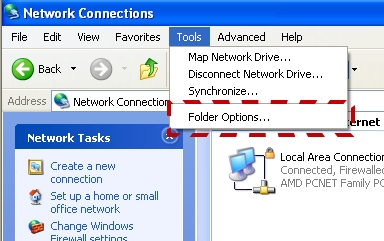
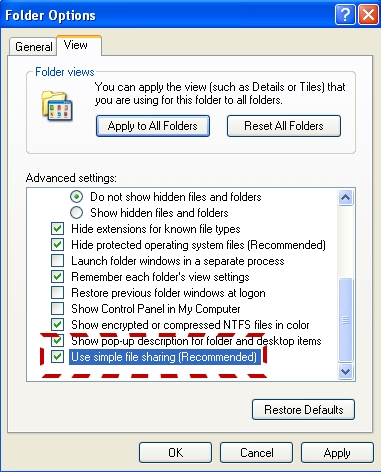
8. Click OK, and in the “Network Connections” Folder click on the tools menu, and select “Folder Options…”
9. Go to the view tab. Scroll down and make sure “Use simple file sharing” is Un Checked
10. Click OK. Sharing is now on, but if you have not set a password for your username you still will not be able to authenticate – IntelliAdmin will keep asking for username and password. Windows XP SP2 requires this for a good reason. You don’t want to leave your computer wide open.
IntelliAdmin should work now. If you have any problems please email us at support@intelliadmin.com – we are always happy to help
One more thing…Subscribe to my newsletter and get 11 free network administrator tools, plus a 30 page user guide so you can get the most out of them. Click Here to get your free tools