ISO files are images of physical CD and DVD ROMS. You can use to burn them to disk. Microsoft now distributes many of their DVD, and CD ROMs from their website in this format.
Many times you just want to pull a few files off the ISO without burning it to physical media. Microsoft has a little known tool for doing this.
You can download it from here
It is not the most user friendly application, but it is free, and it works well. Let me walk you through mapping an ISO file.
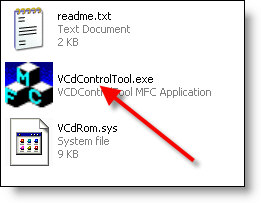
The name of the program is the Windows XP Virtual CD Control panel. Download the file, and extract to the folder you want to run it from.
If you want to map an image file, simply launch the program called VcdControlTool.exe
The first thing we need to do is install a driver. When the program is launched, click on the “Driver Control” button.
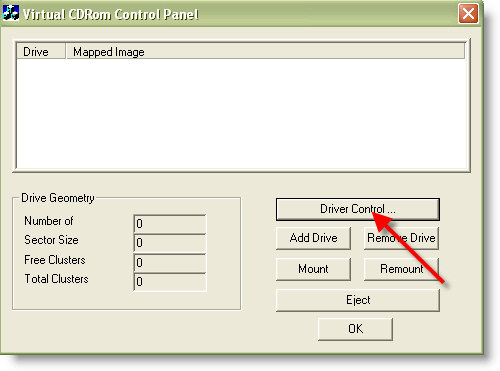
We need to install the driver, so click on the only button that is enabled – “Install Driver”
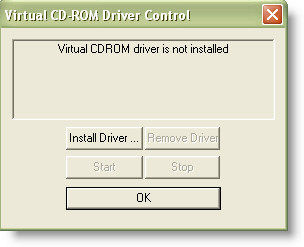
It will open a file browse dialog. It should default to the same folder you installed all the other files for this program….if not you will need to browse back to it and select VCdRom.sys

Once you have selected the driver, the “Start” button will be enabled. Click on it. Now click OK.
We need to add a drive before mounting the ISO. Click “Add Drive” and a drive letter will show up in the window.
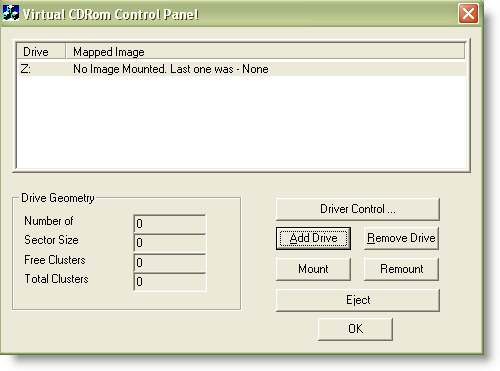
Finally we can map the iso by clicking on the mount button. It will allow you to select an ISO to mount. Select your ISO, and click OK.
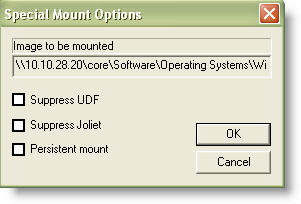
You will be presented with special mount options. You may need to check these if you are having trouble mounting an ISO. Usually when I first try to mount an ISO I leave them all unchecked. If I run into trouble, then I experiment and try each option.
Once you have mounted the ISO, it will look just like a standard CDROM. If we browse to My Computer and look…
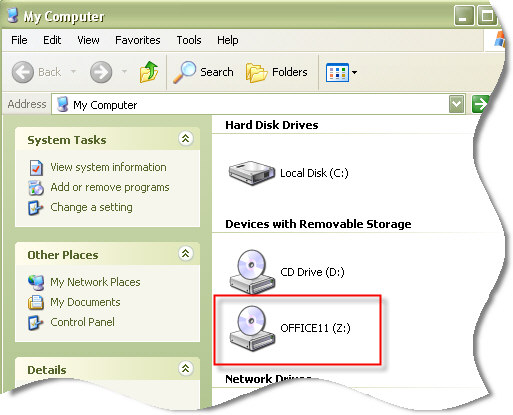
Now I have access to my ISO file, without ever burning it to a disk.
A few last things to note:
1. You don’t need to keep this application open after mounting the ISO. It will stay mounted until you unmount it.
2. If you reboot your system, you will need to remount the drive again
One more thing…Subscribe to my newsletter and get 11 free network administrator tools, plus a 30 page user guide so you can get the most out of them. Click Here to get your free tools
{ 2 comments… read them below or add one }
It seem to not work with Windows 7
You are right about that…seems like it does not work with 7