Since the 3.1 release of our Remote Control Product it has supported group policy. Supporting is nice, but if there is no way to get to these settings, then it does not exist for the customer.
Recently we have been getting requests for a finer level of control over who, and how people can remote into a machine – and a way to lock it down. The group policy method is a great way to do this. You can pick specific users, or groups and grant those groups specific rights, and lock them so they cannot be changed.
Lets say I want my entire IT staff to be able to remote into machines, but the accounting departments says no way – not unless the IT staff is forced to ask permission first. With our group policy administrative template you can do this. Since it uses group policy, even local administrators cannot override the settings.
Now – how do you do it?
First, download our custom administrative template:
http://www.intelliadmin.com/IntelliAdmin5.adm
Save this to the desktop of your domain controller.
Our next step is to add it to the domain controller’s administrative templates in the group policy object editor. That way you can apply it to any group of machines you want. In our demonstration we will only update the default domain policy – which updates all machines within a domain.
Windows 2008 Group Policy
Windows Server 2008, and 2003 have slightly different ways of editing group policy. If you are using 2008 then this is what you need to do to get it open:
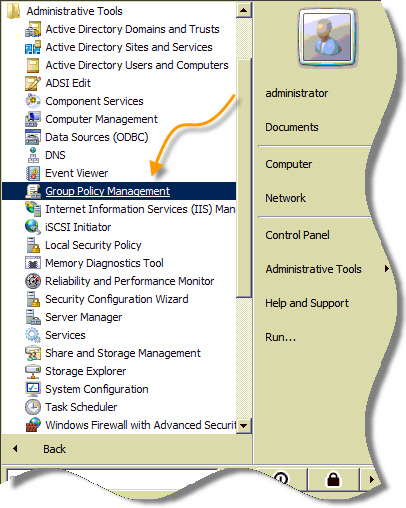
Click on the start menu. Then click on Administrative tools, and then click on the item that says “Group Policy Management”:
Then drill down to Domains -> [Your Domain] -> Group Policy Objects
Right click on Default Domain Policy, and click on edit
Then the group policy editor will be displayed
Windows 2003 Group Policy
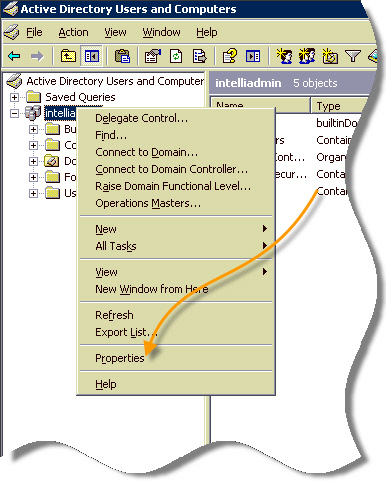
If you are running 2003, then the process is slightly more complicated. On the domain controller, open Active Directory Users and Computers.
Right click on your domain:
Click on properties. Then a dialog will show up. Go to the tab titled “Group Policy”
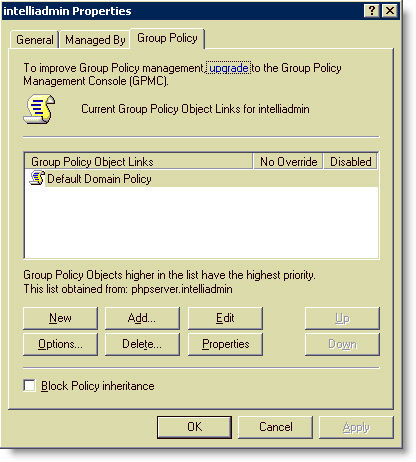
Click Edit, and the group policy management editor is displayed.
Adding the IntelliAdmin.adm template
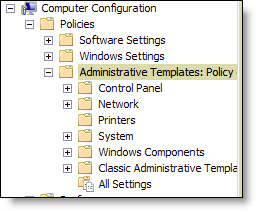
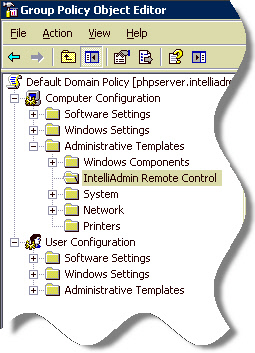
From here, both servers are the same. Expand to Computer Configuration->Policies:
Right click on “Administrative Templates” and pick “Add/Remove Templates…”
Now, you are shown a list of custom templates that have been installed (In the case of my screen shot, none have been installed)
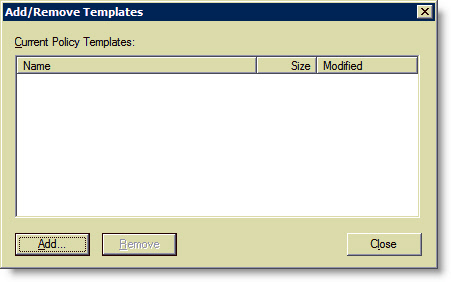
Click Add, and add the IntelliAdmin.adm that you downloaded to the desktop.
After you close out, a new folder will appear “IntelliAdmin Remote Control” (Under 2008 this will appear under Classic Administrative Templates)
Changing and locking down agent settings
Click on it, and you will see these options on the right:
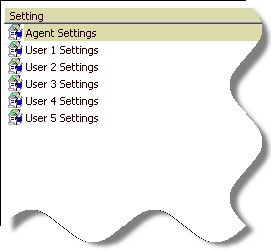
First, lets look at the agent settings. Do this by double clicking on “Agent Settings”:
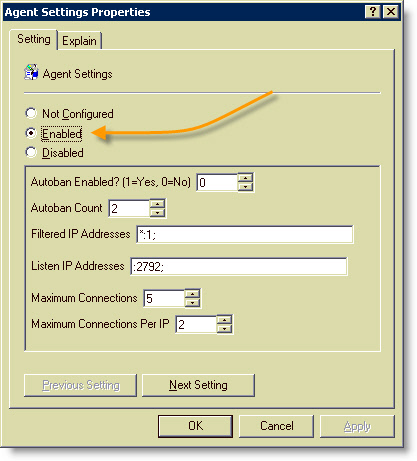
Set it to enabled, and then make the changes you want to lock into the agent. Most of them are self explanatory, but two items have a special format – Filtered IP addresses, and Listen IP addresses. Lets look at filtered IP addresses first:
The current value you see in the screen shot is:
*:1;
This means all IP addresses are allowed. * is a wild card. The 1 means that it is allowed. Each filter entry is separated by a ; and the list must end with a ;
If we wanted to only allow computers in the 192.168.1.X range to connect, we could have something like this:
192.168.1.*:1;
Or if we wanted to allow all computers to connect, but prevent 10.10.10.6 from connecting:
10.10.10.6:0;*:1;
Note that these are processed in order. When the agent finds a match, it will discontinue processing. So if you had done the reverse:
*:1;10.10.10.6:0;
It would never get a chance to prevent 10.10.10.6 from connecting
The other value is “Listen IP Addresses”. The format for this value is :[PORT];
If you wanted the agent to listen on ports 2792, and 5900 it would look like this:
:2792;:5900;
Or simply, if you wanted to change the default port to 3300
:3300;
Adding Users
Now that you have changed the default agent settings, how do you add users? The IntelliAdmin.adm template allows you to configure up to 5 windows users. To add a user, simply double click the user entry and enable it. Always start with User 1, then User 2. If you skip a user (Like enable User 5 when there is no user 4), then the agent will not properly read it from the registry – so make sure they are enabled in order.
In our example, I will go into the properties of user 1 and enable:
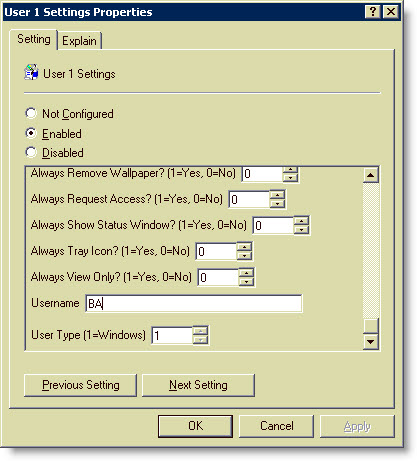
If you notice, the default user name is “BA”. What the heck is BA? Well, BA is an internal identifier that windows uses for the Built-in administrators group. This needs to be used instead of “Administrators” since it is possible that a foreign language version of windows will have a different word for “Administrators”. This is what you want to change. You can type in a security group, or a single user name. Then turn on features you want to lock in. In my case I changed the “Always Request Access” to 1, and the group to “IT Support”. Since I only enabled User1, this means that only members of the “IT Support” group can remote into machines, and the agent will ask the end user permission before they can connect. No matter what those IT people do (Short of getting on the DC and removing this policy) they will always have to ask permission.
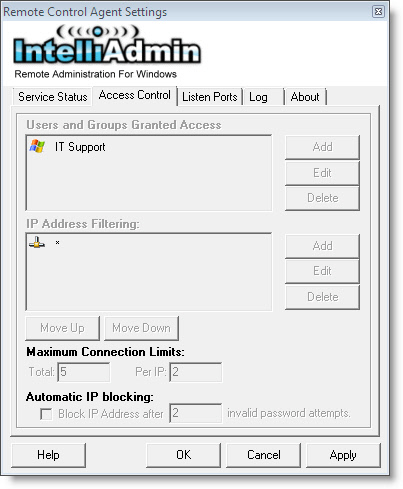
Now, if we load up the agent settings on a machine that is under the applied policy we see our settings, and notice that all of the buttons are grey – no changes can be made:
This stuff can seem complicated at first, and I wish there were an easy wizard we could create to do this for you – but it when it comes to domain policy our options are limited. If you need help, feel free to email us at support@intelliadmin.com
The latest version of our Remote Control, can be downloaded from here:
http://www.intelliadmin.com/setupex.exe
One more thing…Subscribe to my newsletter and get 11 free network administrator tools, plus a 30 page user guide so you can get the most out of them. Click Here to get your free tools